Table of Contents
- Getting Started
- Agent-Based Management
- Common Tasks
- Data Providers
- Directory Services
- Auditing
- Hosts
- Templates
- Template Properties
- Batch Update Templates
- Assign Templates
- Log Management Templates
- SCAP Compliance Monitor
- Active Directory User Monitor Templates
- File and Directory Monitor Templates
- Windows Monitor Templates
- CPU Monitor Template
- Memory Monitor Template
- Disk Space Monitor Template
- Account Lockout Monitor Template
- Audit Policy Monitor Template
- Logon As Monitor Template
- Logon Monitor Template
- Performance Counter Monitor Template
- PowerShell Template
- Process Monitor Template
- RDP Session Monitor Template
- Registry Value Monitor Template
- Service Monitor Template
- SMART Disk Monitor Template
- System Security Monitor Template
- Windows Update Template
- WMI Query Template
- Task Scheduler Template
- Clock Synchronization Template
- Defragment NTFS Disks Template
- Network and Application Monitor Templates
- SSL Certificate Monitor Templates
- Database Templates
- Email Monitor Templates
- SNMP Monitor Templates
- Windows Accounts Templates
- Monitors
- Reports
- Auto-Configurators
- Filters
- Actions
- Schedules
- Environment Variables
- Options
- SNMP
- SSH Shell
- Syslog
- System Reset
- Shared Views
- Active Directory User and Group Filters
- Assign Actions
- Assign Azure Audit Logs
- Assign Consolidated Logs
- Assign Directories
- Assign Disks
- Assign Event Logs
- Assign Files
- Assign Services
- Assign Shares
- Auto-Config Host Assignment Properties
- Define CSV and W3C Log Entry Columns
- Define Log Entry Columns
- Define Log Entry Columns with Regular Expressions
- Executable Status
- Executable Timeline
- Explicitly Assigned Logs
- File Explorer
- General Executable Properties
- Report Columns
- Report Date/Time Ranges
- Report Security Event Log Filters
- Select Folder or File
- Target Files and Sub-Directories
- Command Line Interface
- Server Configuration
- Agent Configuration
- Troubleshooting
- Best Practices
- Terminology
Corner Bowl Server Manager
SIEM, IPS, Server Monitoring, Uptime Monitoring and Compliance Software
RDP Session Monitoring and Reporting
In this Topic
Tutorials
 How to Automatically Disconnect Idle RPD Sessions and Report on all Network-Wide RPD Sessions
Overview
Corner Bowl Server Manager provides RDP Session Monitoring that goes far beyond the limited built-in Windows Session Time Limits. The add value features include monitoring specific Security Groups and Users as well as data transfer, a potential indicator of espionage. Also included, is the ability to report on all network-wide RDP Sessions in a single data table.
Common Tasks
- Manually disconnect any RDP Session.
- Automatically disconnect idle RDP Sessions.
- Generate network-wide RDP Session Reports.
How to Manually Disconnect an RDP Session
- From the Explorer View, find the target host under the root Hosts node. Right click then select Host Properties. The Host Properties View displays.
- From the Host Properties View, select the RDP Tab.
- Selecting the tab reveals the current RDP sessions. If the Windows Server is not using the Agent, this view attempts to connect using either the service credentials or impersonation, if configured, then Microsoft's built-in network API is utilized.
- You have 2 disconnect options. You can disconnect a user which saves the logon session state for later use then disconnect the session or you can logoff the session off which logs the user off without saving the session state permanently terminating the session.
- To disconnect the session, right click on the session then click Disconnect.
- Once clicked the user is disconnected and the connection state changes to Disconnected.
- To log a session off, right click on the session then click Logoff.
- Once clicked the user is logged off, the connection is terminated and removed from the list.

Manually Disconnect an Idle RDP Session
How to Automatically Disconnect Idle RDP Session
- From the Explorer View, find the sample RDP Session Monitor Template located in the following path:
Templates / Sample Templates / Windows / Accounts / RDP Session Monitor Template
- Right click on the Template then select Template Properties. The Template Properties View displays.
- Use the General Tab to schedule the frequency to scan RDP Session.
- Use the Options Tab to configure the trigger criteria and RDP Session instance Actions. This view displays a read-only view of the columns which will be returned.
- Use the Warning and Critical Trigger controls to specify the columns to filter. Use the IDLE_TIME_SPAN column to monitor idle time. Use the DATA_OUT column to monitor the amount of data transferred from the server to the user's desktop.
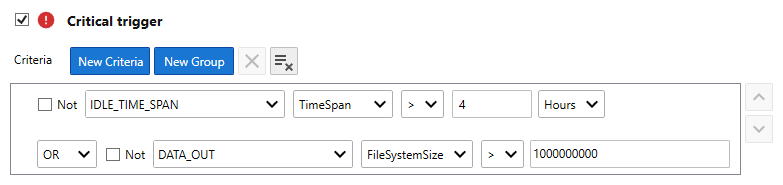
Idle RDP Session Trigger Criteria
- Use the Warning and Critical Trigger drop-downs to select one of the following Actions:
| Action | Description | Location |
|---|---|---|
| Disconnect RDP Session | An auto-generated Action that saves the logon session state for later use then disconnects the user. | Sample Actions / RDP |
| Logoff RDP Session | An auto-generated Action that logs the user off without saving the session state permanently terminating the user's session. | Sample Actions / RDP |
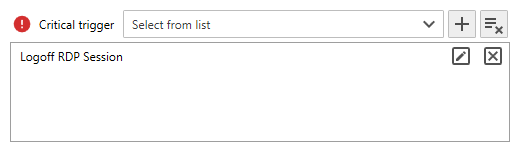
RDP Logoff Action
- Use the User Filters Tab to filter out or target specific Security Groups or Users.
Note
When monitoring multiple domains, and utilizing Active Directory, you must create a separate template for each domain.
- Use the Agent Tab to enable the Agent, otherwise, Microsoft's Remote Desktop Services API.
- Use the Action Tab to assign network administrator email notifications.
- Use the Assignments View to assign each host or a group of hosts.
How to Report on All Network-Wide RDP Sessions
- From the Menu Bar, select File / New. The New Report View displays.
- From the New Report View, expand Summary Reports then select Summary Report.
- Select the Template Assignments Tab then assign the RDP Session Monitor Template.
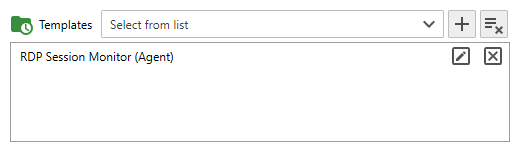
RDP Session Report Template Assignment
- Select the Options Tab.
- Check the Re-execute each monitor option to execute the template on each assigned host.
- From the Group by drop-down select Template.
- From the Columns drop-down select RDP Session Monitor.
- Choose the columns to include. Notice you also have the option to sort by specific columns.
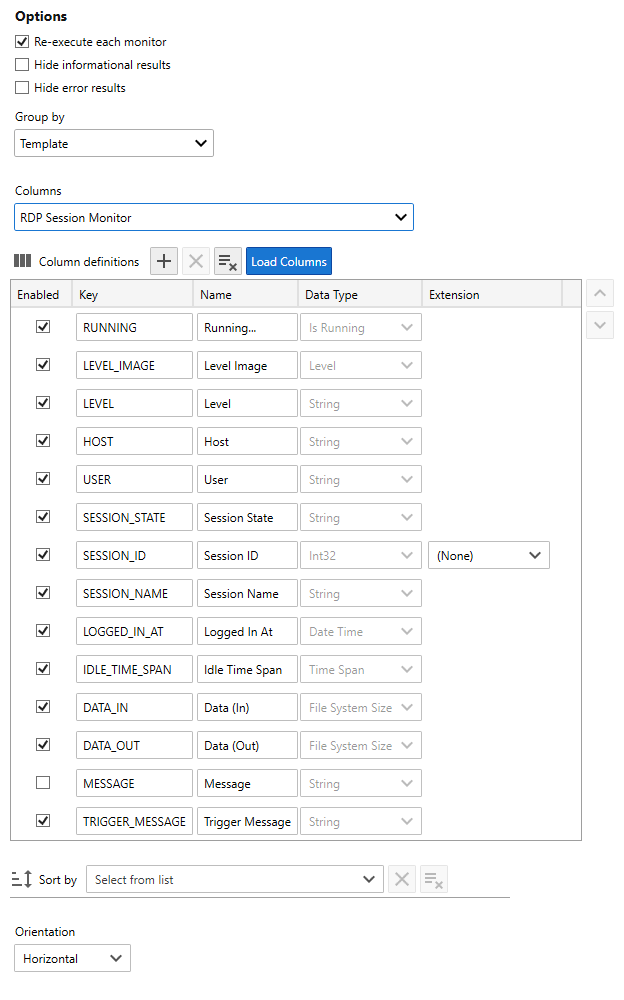
RDP Session Report Properties
- Next, assign the root Hosts Group to include all hosts that have the template assigned.
- Next, click the Auto-Generate Name
 .
. - Click Save, then View Report.